

Deep Dish Pizza Dough

Save the argument for another day, today you make Chicago style DEEP DISH PIZZA! Not be confused with pan pizza, a proper deep dish slice has a distinct L-shaped crust which comes from pressing the dough up the side of the pan. It also has a thicker crust which calls for some added flavor and savoriness. In this case, butter!
Unlike the smash-hit Sicilian recipe, this one uses all-purpose flour and butter, does not need to proof in the pan, and involves refrigeration to get a little bit tighter of a dough structure. There are also a few pro techniques and tricks in here that require some practice to get just right. So please jump right in and practice, practice, practice! FORZA CHICAGO!
This recipe is based on a 14” diameter pan. If you have a different size, just click here for the adjusted recipe.
Ingredients
510g All purpose flour
280g Cold water
5g Active dry yeast
16g Salt
50g Unsalted butter (about 4 tablespoons)
Unsalted butter for buttering the pan
Pecorino Romano for dusting the pan
Tools
Steps
1. Add the yeast and then water in a small mixing bowl and stir rigorously to break up any clumps and until cloudy as shown. I like to stir with a fork. Let the yeast and water mixture sit for about 10 minutes.

2. Melt the butter in the microwave or in a small saucepan and keep it to the side.

3. Add the flour to your mixing bowl. I like to shake the flour to one side as I feel it helps incorporate the water during mixing.

4. Add the yeast and water mixture to the mixing bowl on the side opposite the flour.
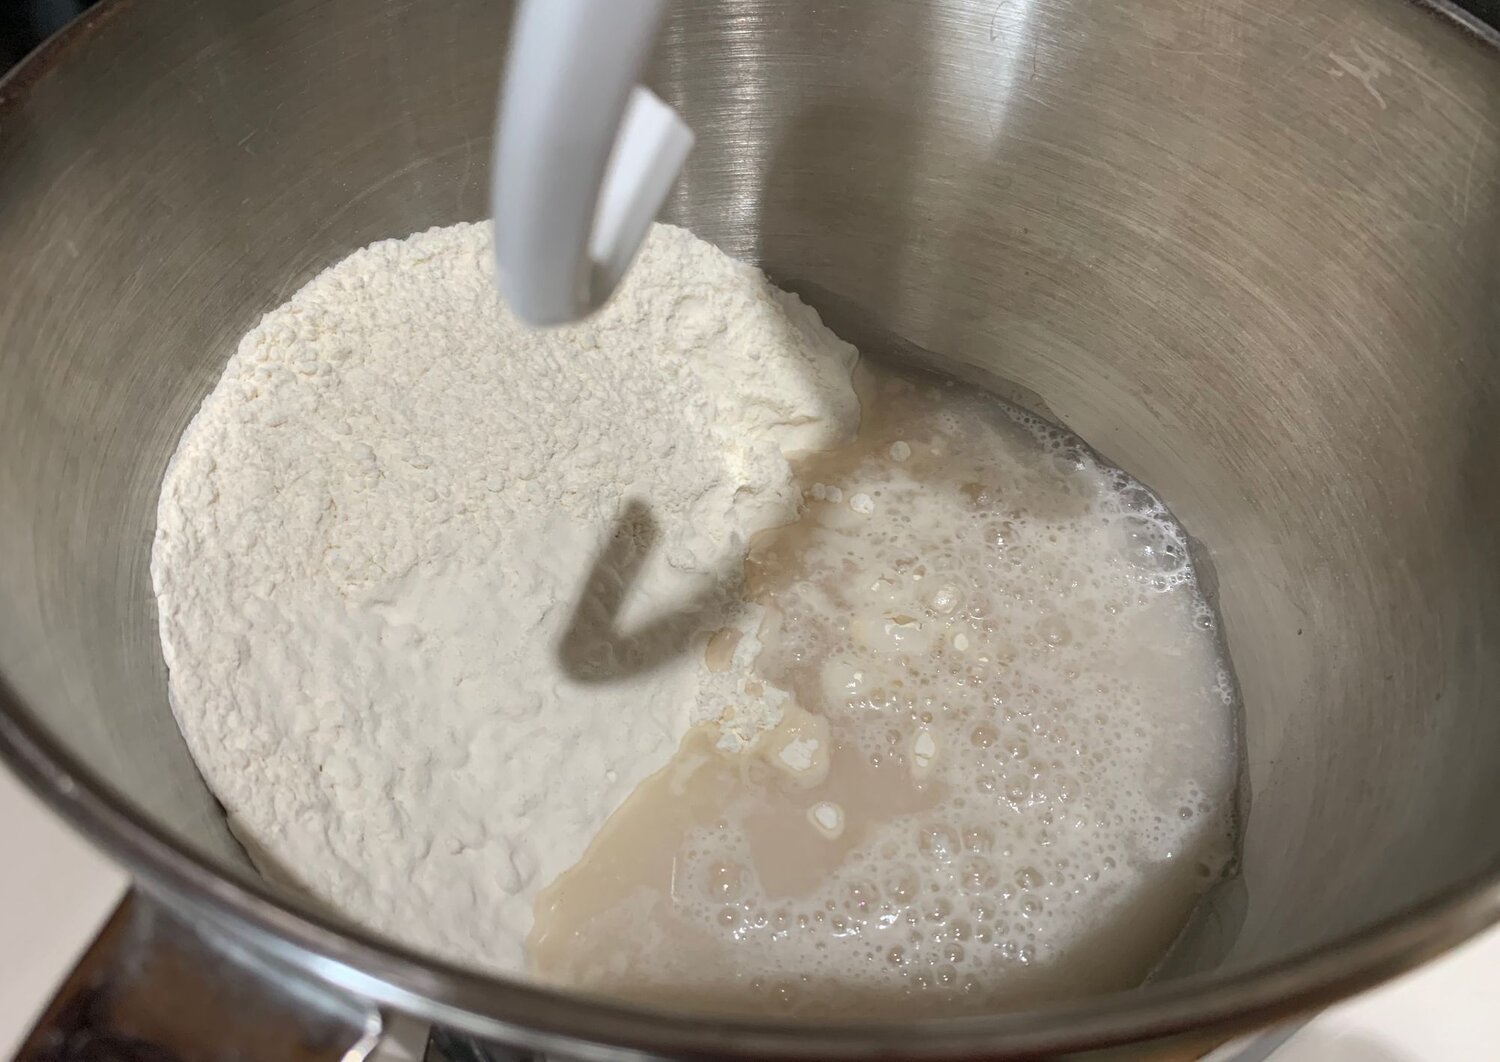
5. Using a hook attachment, mix on the lowest speed for about 60-90 seconds until the mixture looks like the picture below.

6. Add the melted butter to the mix. No need to stop the mixer. If the butter is still warm or a little hot, that is ok. It won’t alter the temperature of the dough much or at all.

7. Continue mixing on the lowest speed until all the dough is formed and no flour is left on the sides of the bowl.

8. Cover the bowl with a towel and let the dough rest for about 20 minutes
9. Add a splash of water to your salt, like a tablespoon or less, to make somewhat of a slurry.

10. Add your salt slurry right on top of the dough. and mix on the lowest speed for another 2 -3 minutes. Mixed dough should like below and you should not feel much salt on the outside. If you pull out the dough and still feel some salt, just fold and knead the dough with your hands. Use some muscle and do this for about 20 seconds or until you no longer feel the salt.

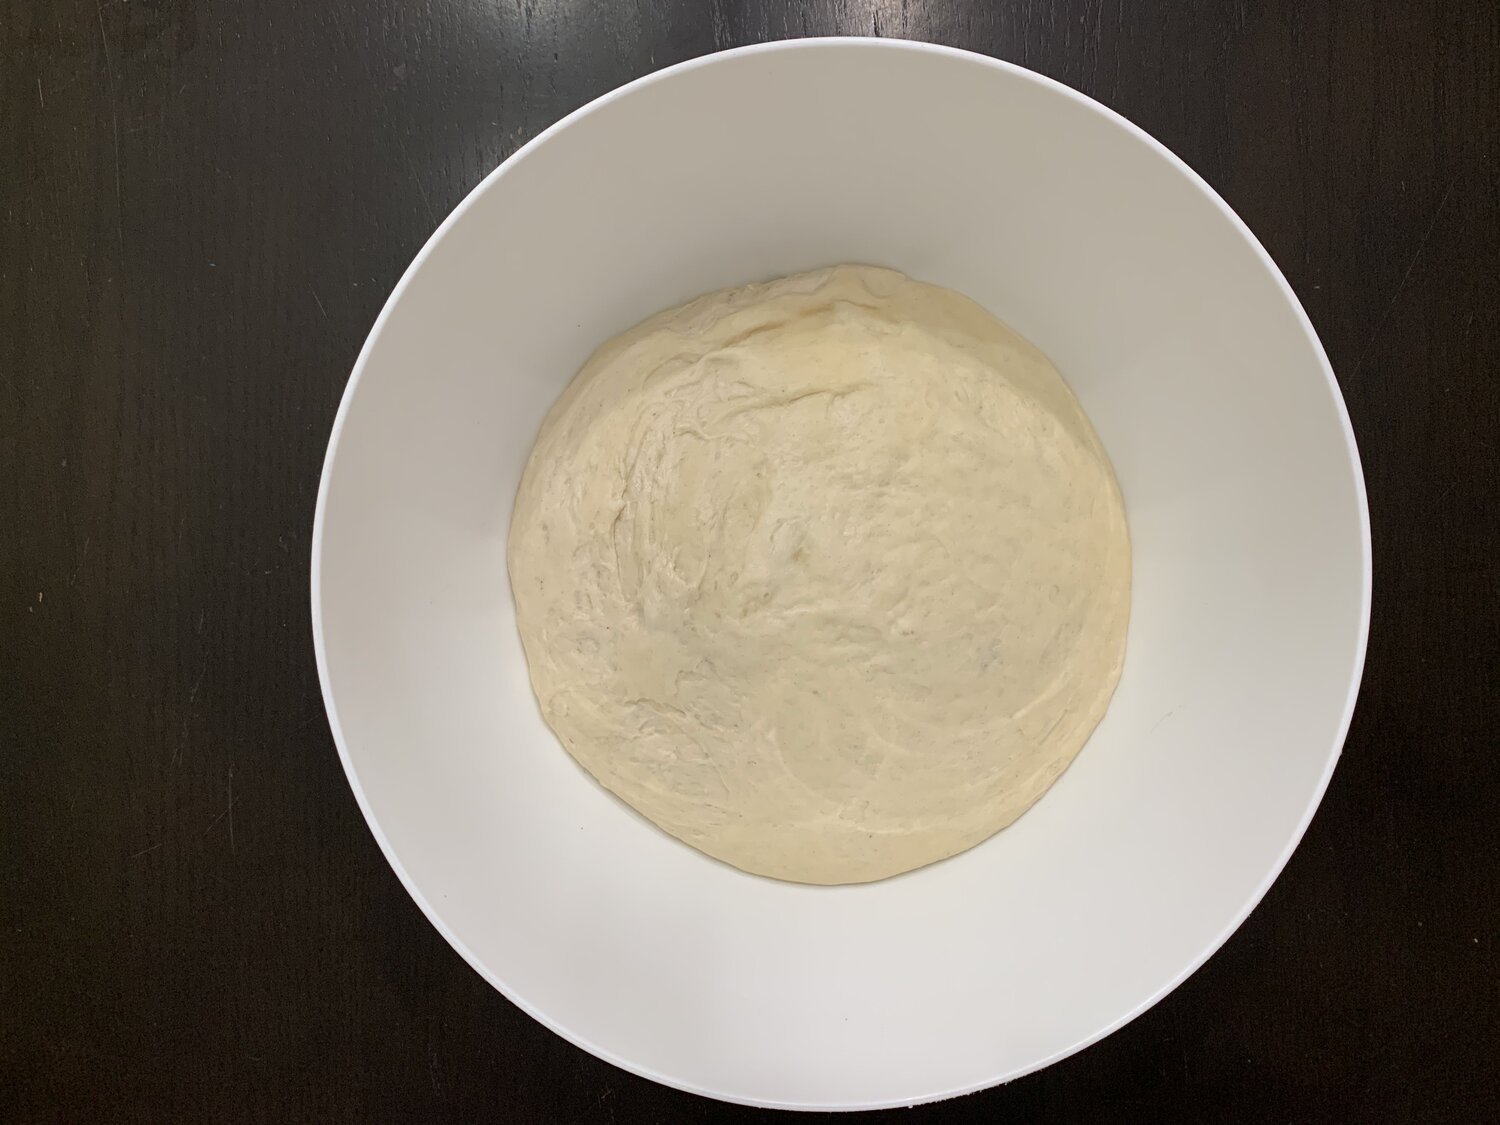
11. Shape the dough into a ball and place it in a very lightly oiled bowl.

12. Cover the bowl with plastic wrap, let the dough rest at room temperature for about an hour, and then put it in the fridge.

13. Keep the dough in the fridge overnight, or for about 8-10 hours. Below is how the dough will look after 10 hours in the fridge.

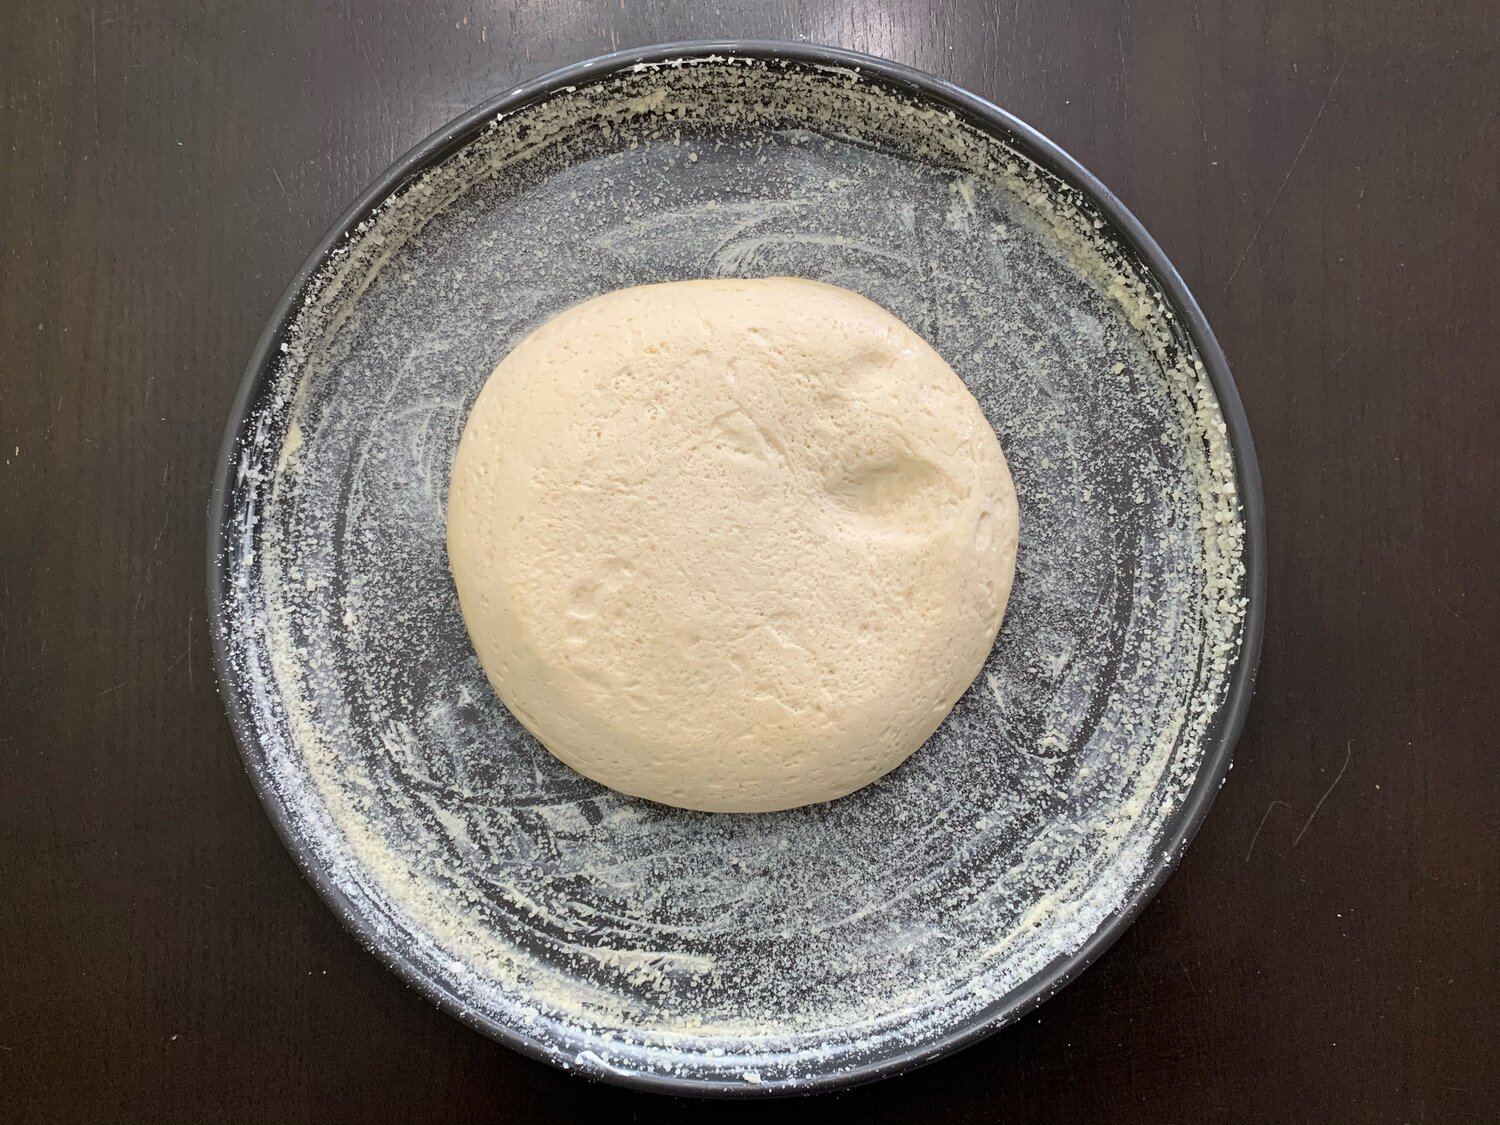
14. It is difficult to stretch cold dough and putting cold dough in the oven will not give you a nice bake. It will take about 3 hours for the dough to get to room temperature. At room temperature the dough rising really begins to speed up. I prefer to let the dough rise 8 - 12 hours from when it is removed from the fridge. So if you wake up at 8am and pull the dough out of the fridge, you’ll be ready to bake anytime after 4pm. In time for dinner! Below is what your dough will look like 12 hours out of the fridge.
15. Take a softened stick of unsalted butter and butter the bottom and sides of the pan. You can pretend like you’re coloring with a butter marker, or smash and spread with a rubber spatula.

16. Next is the real game-changer. Cheesing the pan! Grab 2 large handfuls of pecorino Romano and drop it in the center of the pan. Pick up, shake, and tilt the pan until it is evenly coated with pecorino.

17. Flip your bowl upside down in the pan so the dough releases and falls in the center. Give it a few taps and shakes or help it with your hand if you need to.
18. Remove the bowl and begin stretching the dough. To do this, start in the center and push the dough to the sides of the pan making sure to keep uniform thickness all around.

19. You’re trying to get dough buildup at the “corner” of the pan so you can then pull it up. With your thumbs on the outside of the pan, use your other fingers to press the dough against and up the side of the pan and while rotating. This step is VERY important as the “L-shaped” crust is what defines and distinguishes a deep dish pizza from just a pan pizza.

20. You should not have much extra, but if you end up going too high in some spots or you have a shorter pan, just trim it with a pizza cutter. Above is the end result on a 14’ diameter, 2” inch tall pan with no dough trimming.
21. And that’s it for the dough! Topping technique, topping combos, and baking will be covered in their own recipes!